
Motorcycle Maintenance - The Basics
A Guideline To The Essentials
All motorcycles, old and new, require a little TLC every so often. Chains need lubricating, tyres need pumping, so on and so forth. Basic motorcycle maintenance will optimise the performance of your motorcycle, lengthen the life of its components, and make your rides a whole lot safer. Follow these simple beginner’s tips as a standard checklist, to keep your motorcycle in tip-top shape.
Tyres - Motorcycle Maintenance
Before Each Ride – Inspect your tyres on your routine walk around, before setting off each time. Check the tread indicators to ensure your tyres have substantial life left in them, and if not, replace them at the next opportunity. Refer to your trusty owner’s manual for suitable replacements.
Also before each ride, check the general condition of your tyres. For a safe trip, no bulges, foreign objects, punctures, slits, cuts or cracks, should be visible.

Weekly – Several factors, including cold weather, can affect your tyres’ pressure, so they should be checked weekly using an accurate gauge. Don’t worry if you don’t own one – machines serving the same purpose can be found at most petrol stations. Once again, refer to your owner’s manual to determine what is the appropriate pressure, remembering that the front and rear tyres will be different from each other.
Long Term – Regardless of their condition, tyres have an expiry date. Five years after they were initially made, they will need to be inspected professionally, on an annual basis. After ten years, it is advised that tyres should be changed, no matter how much they’ve been ridden on. Most riders won’t see a set of tyres reach this point before they need replacing, but it’s worth thinking about if you’ve got your eye on an old bike that’s been sat in someone’s garage for a while.
Chain - Motorcycle Maintenance
500 Miles – Just the one number to remember for drive chains – 500. Every time you’ve racked up another 500 miles, check your chain. Things to check include;
• Tension
• Alignment
• Wear
• Cleanliness
• Lubrication
Tension – Each motorcycle’s chain allows for a different amount of free play in its slack. A sticker stating this measurement can usually be found on the swing arm, and the chain’s tightness can be adjusted using tools like the Tru Tension Chain Monkey.

Check The Chain’s Tension & Alignment, And Keep It Clean
It’s important to get the slack to fall within the specified amounts, as excessively tight, or loose chains are both harmful. Too tight – you’re adding unnecessary stress on the bike’s components, so they’ll wear more quickly. Too loose – there’s a risk of the chain coming off and throwing you over your handlebars!
Alignment – After making any adjustments to the chain, it is essential that it is realigned correctly. Simple tools are available to help you do this, as well as markings on your swingarm. Ensuring your chain is properly lined up will prevent wear on both the sprocket and the links.
Wear – A worn sprocket will have blunted, overly sharpened, or misshapen teeth. This is hazardous, as the chain is at risk of coming loose and jumping off the teeth. Nobody wants a flying band of metal binding up by their ankles at 70mph, so replace the sprocket when it is no longer in prime condition.
Cleanliness – Every time you ride, it’s worth taking a glance at the cleanliness of your chain. The rule of 500 miles still applies though, and you shouldn’t have to scrub away at it before then. When you do, use a brush, cloth or other tool, specifically designed for cleaning a motorcycle chain. Harsh wire brushes can scratch the links, and should be avoided. Even rust and stubborn grime will come off with the right products, and some good old elbow grease.
Lubrication – Once the dirt has been removed from your chain, it will need lubricating. Chain oil works better when the chain is warm, so it should be applied after a ride, rather than before. A thin spraying of oil is adequate, and is most effective when left to soak overnight.
Brakes - Motorcycle Maintenance
Before Each Ride – It’s a good idea to lightly test your brakes, and listen for squeaking or any other odd noises, before you go for a ride. Feel for stiffness in the front brake lever, and make sure both brakes are operating as they should be.
4000 Miles – Different bikes’ distances will vary, but for my particular model, I have to inspect the brake pads after every 4000 miles. Most other models will also require inspection at around this mark too.
Similarly to tyres, brake pads have an indicator you can gauge their wear by. Check your owner’s manual for how to judge when they’ll need replacing. When you do, replace them simultaneously so your motorcycle continues to brake evenly.
Long Term – Brake fluid will need changing every two or three years, and this process should be carried out by a professional mechanic. You should, however, be checking your brake fluid levels on a regular basis. The front brake fluid should be below the upper limit, and the rear brake fluid should be between the lower and upper limits.
Battery - Motorcycle Maintenance
Weekly – The lifespan of your motorcycle battery largely depends on the attention it is given. Thus, it is recommended you give it a once over on a weekly basis. Keep an eye out for any damage, and clean the terminals as you would your chain – with soft brushes, and soapy warm water. Don’t forget to disconnect it first!
Cold weather, and stagnation, can cause your battery to die a slow death. Keep it topped up when it will be unused for long periods of time by connecting it to a trickle charger like the Oxford Oximiser 900. Either that, or take it out for a good spin every week.
How To Connect An Oxford Oximiser 900
Horn, Lights & Gauges - Motorcycle Maintenance
Before Each Ride – Possibly the quickest and easiest part to tick off your motorcycle maintenance checklist is your horn. Give the button a push, and gauge its efficacy based on the startled looks of those nearby. If it doesn’t sound at the expected volume, have it inspected by a mechanic.
Motorcycle Maintenance For Dummies 101 – Take a look at all your lights in action, including your brakes, indicators and high beam. You should also check that your headlight’s beam is pointed toward the road ahead – not immediately in front of you, or impairing the vision of oncoming road users.
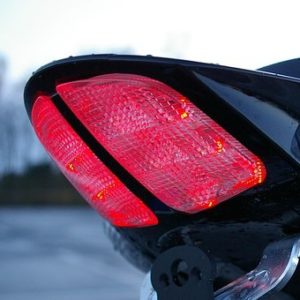
TFT or LED, it’s worth checking that your display lights and gauges are in working order too. Switch on the electrics and check there’s nothing unusual happening, such as flickering or fading.
Side Stand & Kill Switch
Before Each Ride – Both the side stand and kill switch can be tested in the same way. First, raise the side stand and start the bike. While the bike is on, lower the side stand (or flick the kill switch), and the engine should cut out. If your side stand feels rigid, the pivotal point may need lubricating.
Oil, Filters, Coolant & Plugs
Weekly – Enough of the right oil is critical to the smooth running and longevity of your precious machine. Hence, it needs to be monitored every week. For an accurate reading, let the bike cool for 15 minutes before taking your dipstick out, or looking through the sight glass. Then, while your bike is on a level surface, check that the oil reading is between the lower and upper limits. Do this by first removing the dipstick, wiping it clean with a towel, then replacing it, and taking the measurement. If you are low on oil, only top it up using specified oils recommended in your owner’s manual.
Long Term – Every year, when your bike is serviced, you should have your oil changed completely. This is a job some DIY mechanics can manage. If attempted, it should also include the changing of the oil filter. If you do a lot of yearly mileage, your oil and oil filter should be replaced every 8000 miles or so, depending on your model of motorcycle.
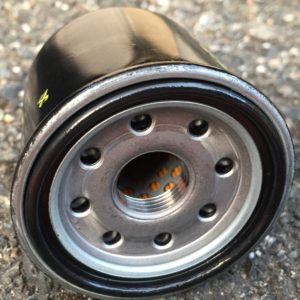
Remember To Replace Your Oil Filter When Changing Your Oil
After every 8000 miles ridden, you also need to observe your engine coolant level. Like your oil, it should lie between the lower and upper limits indicated. My motorcycle requires the engine coolant to be replaced after each 24,000 miles – information that can be found in your aforementioned owner’s manual.
Another part of a full service, will be the inspection, and sometimes replacement, of your spark plug. This should be examined every 16,000 miles (or thereabouts), and replaced every 32,000 miles.
General Care - Motorcycle Maintenance
As some general tips for your motorcycle maintenance, the following can be considered good practice – and perhaps common sense!
Washing – Who doesn’t love a shiny motorcycle? Alright, maybe some dirt bikers who scramble through the mud, and honour caked on muck like hard fought battle scars. My point is the majority of us like a clean machine. In order to keep it spick and span, just use warm soapy water and sponges to wipe the grime off the fairing and nether regions. There are products made especially for cleaning motorcycles, but they aren’t totally necessary. Don’t be afraid, if it can survive the rain, it can handle some soapy water!
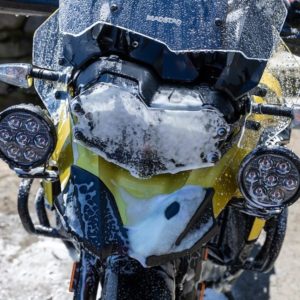
Use Warm, Soapy Water To Wash Your Motorcycle
Keep It Covered – It’s wise to protect your bike from rust and the elements as best as you can. If you don’t have a garage to store it in, buy yourself a motorcycle cover. I use the Oxford Stormex, and it keeps my motorcycle well sheltered. Be aware that cheaper, non-branded covers may melt to your bike if you put them on while the exhaust is still hot.
Fastening straps that prevent your cover from blowing off in windy weather are an extra feature that you may want included. Lock holes by the wheels are also desirable as you can chain your cover to your bike, deterring thieves and making it more secure. Motorcycle covers come in a range of sizes, for small scooters, to large cruisers with panniers attached.
Peace Of Mind
With the knowledge that your motorcycle is in optimum condition, you can ride safely, and with peace of mind. For a further understanding of your motorcycle’s mechanics, I suggest enrolling on one of the many courses available for curious enthusiasts. Below is a course in high demand, and highly rated.
My tips are just the basics of motorcycle maintenance – a rough schedule by which the components should be inspected, and replaced. By following this beginner’s checklist, you should be able to identify any irregularities, before they develop into major problems. As always, stay safe, and seek a professional mechanic for any uncertainties you may have.